How to Clean Laptop Motherboard: Complete Guide
Is your laptop acting up or getting too hot? The issue might be a dusty motherboard. In this guide on How to Clean Laptop Motherboard, we’ll show you how to safely clean the heart of your laptop without the need for professional help.
Whether you’re a tech newbie or just looking to boost your laptop’s performance, this step-by-step guide will make the process straightforward and stress-free. Say goodbye to overheating and sluggish performance with these easy-to-follow cleaning tips!
Why Cleaning Your Laptop Motherboard is Important
The motherboard is the brain of your laptop, controlling all its vital functions. It houses the CPU, RAM, and other critical components that make your device tick.
When dust and dirt accumulate on the motherboard, it can cause several problems, including overheating, short circuits, and poor connectivity between components. In severe cases, it can even lead to permanent hardware damage.
Overheating is one of the most common issues caused by a dirty motherboard. Dust acts as an insulator, trapping heat and preventing the motherboard from cooling down properly.
This can cause your laptop to slow down, crash, or shut down unexpectedly. If left unchecked, overheating can permanently damage the motherboard and other critical components.
A dirty motherboard can also lead to poor electrical connections. Dust and grime can interfere with the flow of electricity between the components, leading to instability, random reboots, and data corruption. In extreme cases, it can cause short circuits that could fry your motherboard, rendering your laptop useless.
Regular cleaning of your laptop motherboard not only improves performance but also extends the life of your device. By keeping the motherboard clean, you ensure that all components can communicate effectively, reduce the risk of overheating, and prevent costly repairs or replacements in the future.
Tools Needed for Cleaning a Laptop Motherboard
Before you begin cleaning your laptop motherboard, it’s essential to gather the right tools. Using improper tools or techniques can cause more harm than good, so make sure you have everything you need for the job. Here’s a list of essential tools:
- Screwdrivers: Laptops are held together with tiny screws, often requiring precision screwdrivers. A set of small Phillips and flathead screwdrivers is a must-have for disassembling your laptop.
- Anti-static wrist strap: Static electricity can damage sensitive components on your motherboard. Wearing an anti-static wrist strap ensures that any static charge is grounded, protecting your laptop from potential harm.
- Compressed air can: This is the safest and most effective way to remove dust from your motherboard. It allows you to blow away dust without physically touching the components.
- Soft bristle brush: A small, soft-bristled brush can help you dislodge stubborn dust particles that the compressed air might not reach. Ensure the bristles are non-conductive to avoid short circuits.
- Isopropyl alcohol (at least 90%): This is ideal for removing grime and sticky residue from the motherboard. Isopropyl alcohol evaporates quickly and doesn’t leave any residue behind, making it safe for electronic components.
- Microfiber cloth: A lint-free microfiber cloth is perfect for gently wiping down the motherboard without leaving fibers behind.
- Plastic or wooden tools: If you need to pry open any components or connectors, use plastic or wooden tools. Metal tools can scratch the motherboard or cause short circuits.
READ MORE: Are Gaming Laptops Good for School
Step-by-Step Guide to Cleaning a Laptop Motherboard
Cleaning your laptop motherboard is a delicate process, but it’s manageable if you follow these steps carefully. Make sure you have plenty of time and a clean, well-lit workspace before you start.
1. Power Down and Disassemble Your Laptop
Start by turning off your laptop and unplugging it from the power source. Remove the battery if possible, and disconnect any peripherals. This step is crucial to ensure your safety and prevent any electrical damage.
Next, you’ll need to open up your laptop. This process varies depending on the model, so consult your laptop’s manual or look for a guide specific to your device. Use the appropriate screwdriver to remove the screws securing the back panel. Keep track of the screws and their positions, as they may be different sizes.
2. Ground Yourself
Before touching any internal components, ground yourself to prevent static electricity from damaging the motherboard. Wear an anti-static wrist strap and clip it to a metal part of your workspace or the laptop itself. If you don’t have a wrist strap, you can ground yourself by touching a metal object that’s connected to the ground, such as a metal table leg.
3. Remove Dust with Compressed Air
Hold the can of compressed air upright and use short bursts to blow away the dust from the motherboard. Start from one end of the motherboard and work your way across, making sure to get into all the nooks and crannies. Be careful not to tilt the can or spray it too close to the components, as this can cause moisture to form.
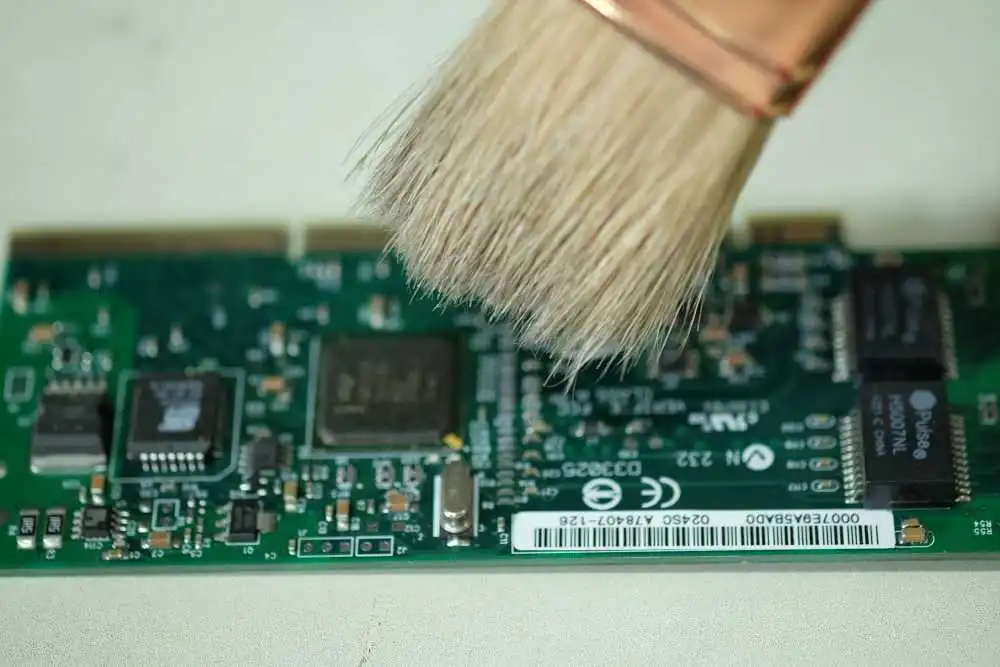
4. Use a Soft Brush for Stubborn Dust
If there’s any dust that the compressed air can’t reach, use a soft-bristle brush to gently dislodge it. Be very gentle to avoid damaging any components or dislodging any tiny parts. Avoid using excessive force or brushing too hard, especially around sensitive areas like the CPU and RAM slots.
5. Clean with Isopropyl Alcohol
For any sticky residue or grime, dampen a microfiber cloth with a small amount of isopropyl alcohol and gently wipe down the affected areas. You can also use a cotton swab dipped in alcohol for hard-to-reach places. Make sure not to soak the cloth or swab, as excess liquid can damage the components.
6. Reassemble Your Laptop
Once you’ve cleaned the motherboard, it’s time to reassemble your laptop. Carefully replace the back panel and secure it with the screws you removed earlier. Reconnect the battery and any peripherals you disconnected. Finally, power on your laptop to make sure everything is working correctly.
Precautions to Take When Cleaning a Laptop Motherboard
Cleaning a laptop motherboard requires caution. Here are some essential precautions to take:
- Avoid Liquids: Never use water or any cleaning solution other than isopropyl alcohol. Water can cause short circuits, while other chemicals may leave residue or damage the components.
- Do Not Force Anything: Laptop components are delicate. If something doesn’t come apart easily, check for hidden screws or tabs. Forcing it can break parts or damage the motherboard.
- Avoid Touching Components: Try not to touch the motherboard or other internal components with your bare hands. Oils and dirt from your skin can damage the circuitry.
- Be Mindful of the Environment: Clean your laptop in a dry, dust-free environment. High humidity or dusty conditions can introduce more contaminants than you remove.
- Keep Track of Screws: Laptop screws are often tiny and easy to lose. Use a magnetic tray or a small container to keep them organized.
READ ALSO: Troubleshooting laptop Wi-Fi connectivity issues
How Often Should You Clean Your Laptop Motherboard?
The frequency of cleaning your laptop motherboard depends on your environment and usage. Here are some general guidelines:
- Every 6 to 12 Months: For most users, cleaning the motherboard once or twice a year is sufficient. This helps prevent dust buildup and keeps the components running smoothly.
- If You Notice Overheating: If your laptop starts overheating or the fans run loudly, it may be time to clean the motherboard sooner. Overheating is a sign that dust might be insulating the components.
- High-Dust Environments: If you use your laptop in a dusty or humid environment, consider cleaning it more frequently—every 3 to 6 months.
- After Major Repairs: If you’ve had to open your laptop for any repairs, it’s a good idea to clean the motherboard while you have it open.
Common Mistakes to Avoid While Cleaning a Laptop Motherboard
Cleaning a laptop motherboard isn’t overly complicated, but there are some common mistakes to avoid:
- Using a Vacuum Cleaner: Never use a vacuum cleaner to remove dust from your laptop. The suction can generate static electricity, which could damage the components.
- Over-Saturating with Alcohol: While isopropyl alcohol is safe for electronics, using too much can cause it to seep into areas where it shouldn’t be. Use it sparingly and ensure it evaporates completely.
- Forgetting to Ground Yourself: Static electricity is a serious risk when working with electronic components. Always ground yourself before touching the motherboard.
- Skipping Small Areas: Dust can accumulate in small crevices, such as around connectors and ports. Don’t rush the cleaning process—make sure to clean every part of the motherboard.
- Reassembling Without Testing: Before fully reassembling your laptop, make sure to test it. Turn it on and check for any issues. This way, if something isn’t working, you can easily troubleshoot without having to disassemble it again.
Signs Your Laptop Motherboard Needs Cleaning
It’s not always obvious when your motherboard needs cleaning. Here are some signs that it’s time to give your laptop a thorough cleaning:
- Overheating: If your laptop is getting unusually hot or the fans are constantly running at full speed, it may be due to dust on the motherboard.
- Slow Performance: A dirty motherboard can cause poor electrical connections, leading to slow performance, frequent crashes, or freezes.
- Unusual Noises: Grinding or buzzing noises could indicate that dust is interfering with the fans or other moving parts.
- Frequent Crashes or Reboots: Random reboots or crashes can be a sign of short circuits caused by dust buildup on the motherboard.
- Visible Dust: If you can see dust buildup around the vents or on the motherboard itself, it’s time for a cleaning.
Best Practices for Maintaining a Clean Laptop Motherboard
Regular maintenance is key to keeping your laptop’s motherboard clean and functional. Here are some best practices:
- Keep Your Laptop in a Clean Environment: Try to use your laptop in a dust-free environment. Avoid placing it on soft surfaces like beds or carpets, which can trap dust and restrict airflow.
- Use a Cooling Pad: A cooling pad can help reduce the amount of dust that enters your laptop by improving airflow.
- Regularly Clean the Vents: Dust can accumulate in the vents, restricting airflow and causing the motherboard to overheat. Use compressed air to clean the vents every few months.
- Elevate Your Laptop: Using a laptop stand can improve ventilation and reduce the amount of dust that gets inside.
- Avoid Eating Near Your Laptop: Food particles and liquids can easily find their way into your laptop, causing dust buildup and potential damage.
- Schedule Regular Cleanings: Set a reminder to clean your laptop’s motherboard regularly. This proactive approach will help prevent issues before they arise.
FAQs:
1. Can you clean a laptop motherboard with alcohol?
Yes, you can clean a laptop motherboard with isopropyl alcohol (at least 90%). It effectively removes grime and sticky residues without leaving any residue or moisture. Use a small amount on a microfiber cloth or cotton swab, and gently clean the affected areas. Avoid using excessive liquid and ensure it evaporates completely.
2. How to clean dust off a laptop motherboard?
To clean dust off a laptop motherboard, use a can of compressed air to blow away loose dust. Hold the can upright and use short bursts to avoid moisture buildup. For stubborn dust, use a soft-bristle brush to gently dislodge it. Be careful not to apply too much pressure or touch the components with your fingers.
3. Is it safe to clean a laptop motherboard yourself?
Yes, it’s safe to clean a laptop motherboard yourself if you follow proper precautions. Ground yourself to prevent static electricity, use the right tools like compressed air and a soft brush, and avoid using water or harsh chemicals. With care and attention to detail, you can effectively clean the motherboard without causing damage.
4. What is the best way to clean a laptop motherboard?
The best way to clean a laptop motherboard is to use compressed air to remove loose dust, followed by a soft-bristle brush for any stubborn particles. For grime or sticky residues, lightly dampen a microfiber cloth with isopropyl alcohol and gently clean the affected areas. Always ensure that you’re grounded to prevent static damage.
5. How to clean a laptop motherboard without damaging it?
To clean a laptop motherboard without damaging it, follow these steps: power down the laptop and disconnect it from the power source, ground yourself to prevent static electricity, use compressed air and a soft brush to remove dust, and clean with isopropyl alcohol for any residue. Be gentle and avoid excessive force or moisture.
Final Thoughts on Laptop Motherboard Cleaning:
Regular maintenance is vital for your laptop’s performance and longevity. By following the steps in this guide, you can safely clean your motherboard, preventing issues like overheating and poor performance. Remember, a little effort now can save you from costly repairs later. Keep these tips in mind, and your laptop will thank you!


